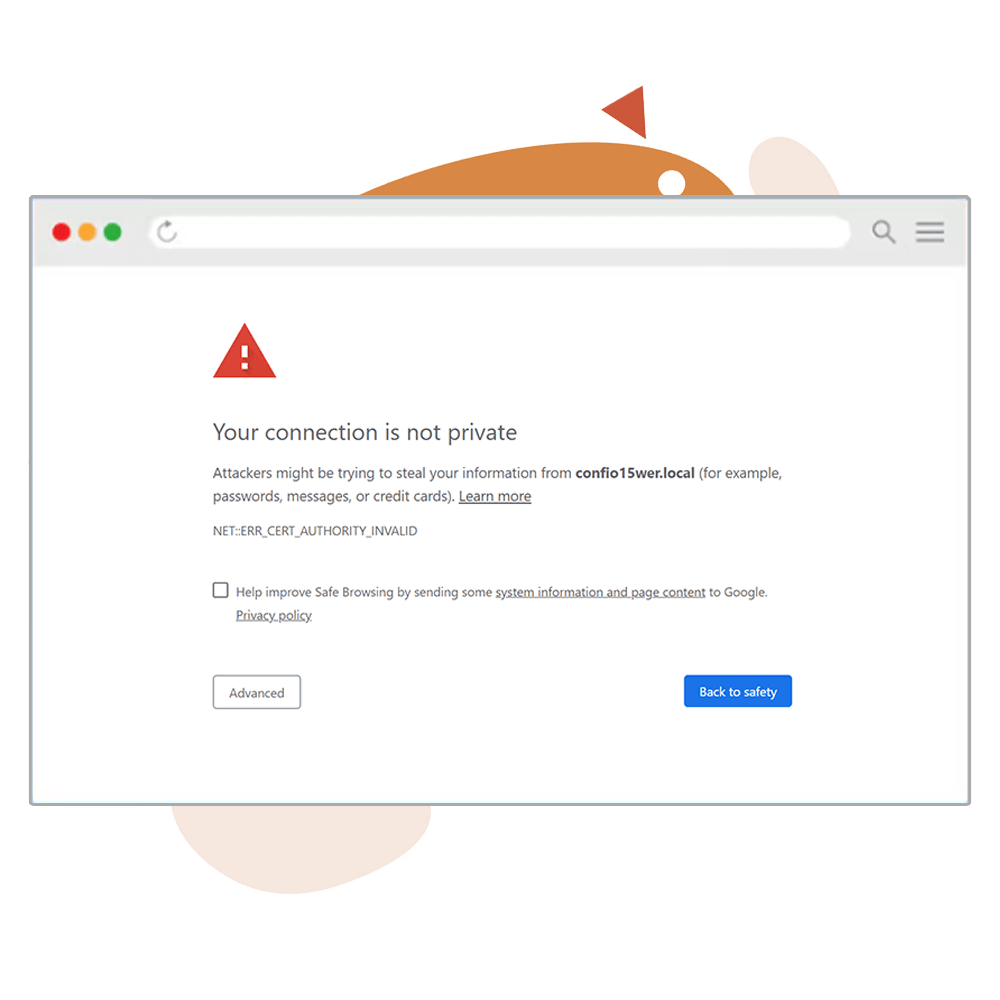

To fix the “Your Connection Isn’t Private” error, we must install and secure our WordPress website with an SSL certificate.
In the browser window, an unsecured website will display a red padlock to the left of its URL address.

Most hosting companies offer the option to install a free basic SSL certificate, which is suitable for most sites.
Another alternative is an SSL certificate by Let’s Encrypt.
Let’s Encrypt is a free, open endorsement authority that offers SSL certificates to the general public as part of the Internet Research Group, a public service.
Install SSL Certificate From Hosting Provider
The first method is the simplest one, and most hosting companies enable it.
If your hosting provider doesn’t allow you to install a free SSL certificate, I highly recommend switching to a different provider.
You can easily install the green padlock from inside your hosting dashboard.
The screenshots below were taken from HostGator, but the process is almost identical to all the hosting dashboards.
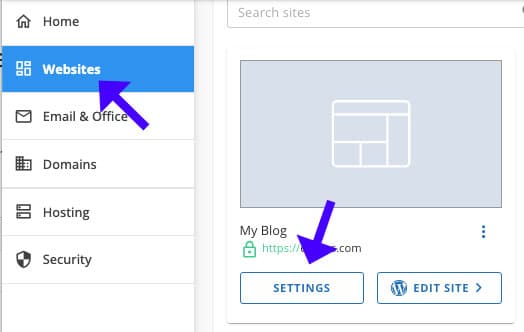
First, log in to your hosting dashboard and click on the Websites tab on the left.
Then, find the website on which you want to install a certificate and click the Settings button.
Click on the Security tab to view your current certificate status. The certificate is already enabled in the screenshot below, so nothing else needs to be done.
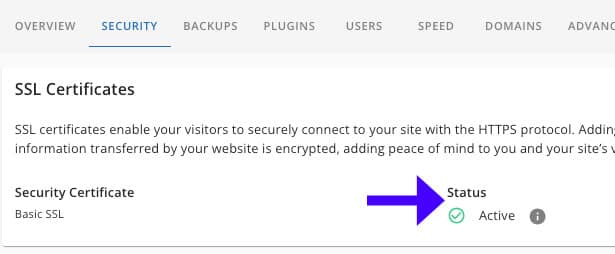
However, if no SSL certificate was installed on this domain, you would have the option to toggle the button and enable it.

Install SSL Certificate With Let’s Encrypt
As mentioned above, Let’s Encrypt is a free SSL certificate service you can use to secure your website.
In this section, we will learn how to install the Let’s Encrypt SSL certificate with a WordPress plugin.
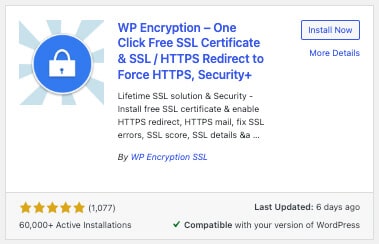
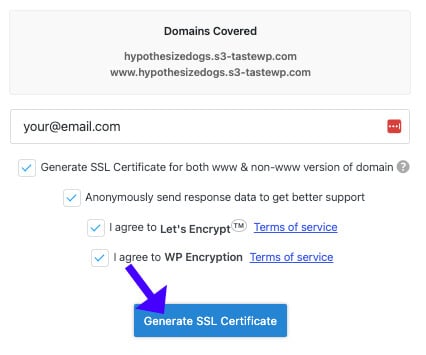
First, navigate to your WordPress dashboard and into Plugins -> Add New.
Search for and install the WP Encryption plugin.
Once activated, navigate to the WP Encryption tab, enter your email address, and click the Generate SSL Certificate button.
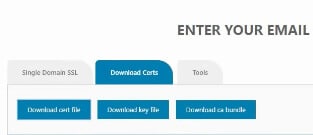
The plugin will create a certificate for you, which you must download to your computer.
For now, open each file with Notepad software. In the next section, we must copy and use the values.
To download the certificate credentials, scroll down, click on the Download Certs tab, and then click on the three buttons to download the certificate, key, and bundle.
Once downloaded, log in to your hosting panel and click on the websites tab on the left (check the image above).
Then, click the settings button for the website on which you want to install the certificate and navigate to the Advanced tab.
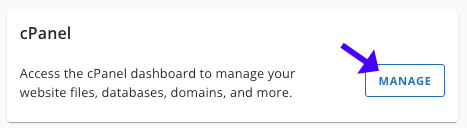
Scroll to the button on that page and launch the cPanel.
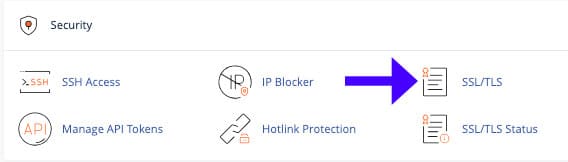
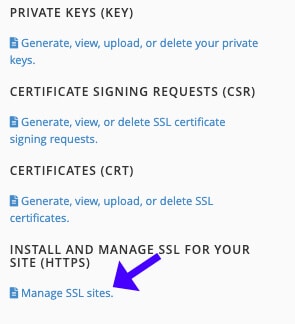
Inside the cPanel, click the SSL/TLS option under the Security section.
On the next screen, under the Install and Manage SSL for your site (HTTPS) title, click the Install and Manage SSL Sites link.
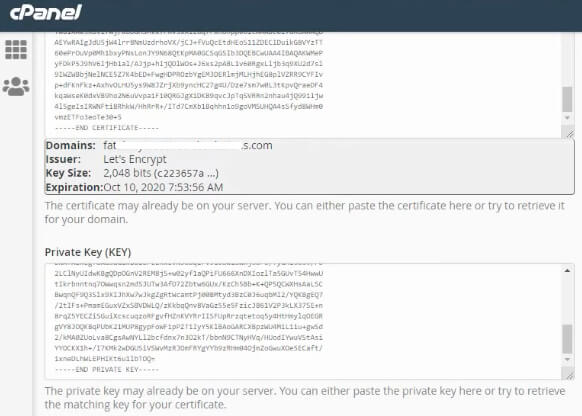
Please scroll to the bottom of the page, select your domain name from the list, paste the proper values in their corresponding position, and click Install Certificate.
Enable the HTTPS Protocol
After finishing the process above, return to the WP Encryption plugin panel and click the Enable HTTPS Now button.
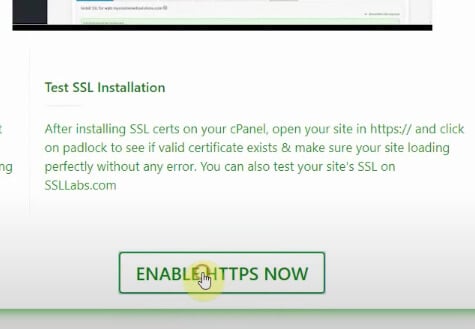
Clicking on the button will log you out of your website, and you’ll need to log in again.
After logging in, you’ll see the green padlock to the left of your URL address. This indicates that your website is now encrypted with an SSL certificate.
Change Your Website’s Address to HTTPS
The heavy lifting is done. You must now change your website URL to include the HTTPS protocol. It’s easy to do.
From your WordPress dashboard, navigate to Settings -> General, and change the WordPress Address URL and Site Address URL to include HTTPS.
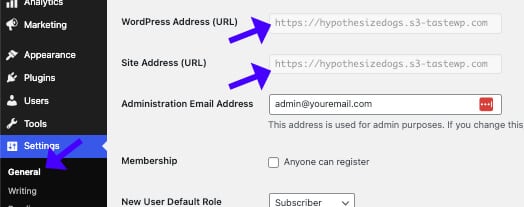
Then, scroll to the bottom of the Settings page and save the changes.
Revisit your website to ensure it loads with the HTTPS protocol on its URL address.
No Green Padlock Troubleshooting
If you still see the “Your Connection Isn’t Private” error after installing the SSL certificate on your website, it doesn’t mean it is not secured.
Some items (usually images and videos) were uploaded to that page while the website was not secured, and the webpage still links to their old URL.
In that case, the browser will still consider the web page not private and will display the error message.
We must identify and replace the files or content causing the error to fix that.
To do that, go to the only whynopadlock.com detection tool, enter your unsecured URL address, and click Test Page.
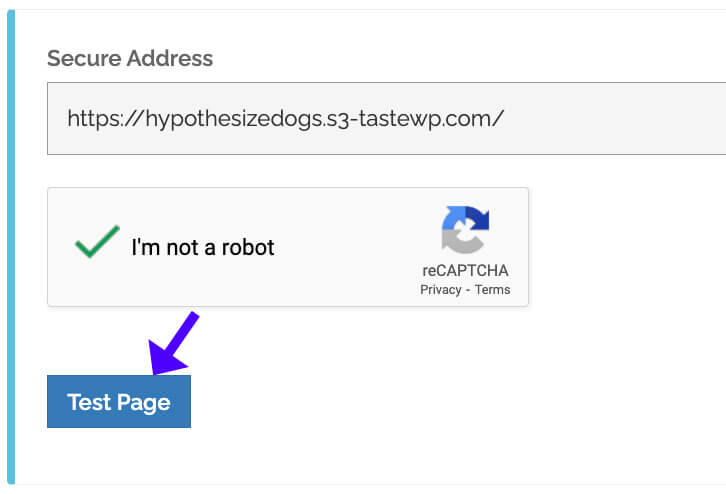
The WhyNoPadLock website will analyze the webpage and provide the fix you need to see the green padlock.
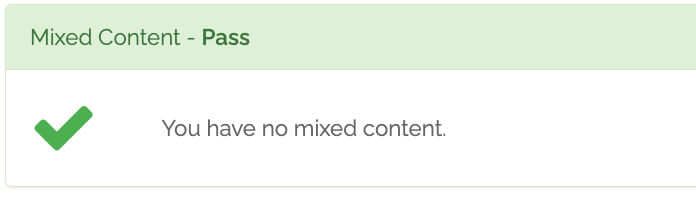
If, for example, the page is displaying an image with HTTP rather than HTTPS, you’ll need to re-upload the photo and replace it on that page.
Once you have replaced all the necessary items, based on the presented list, scan that page again to verify it has passed the mixed-content criteria.
Finally, refresh the page and validate. You should see the green padlock, and the “Your Connection Isn’t Private” error message should be gone.
Your Connection Isn’t Private Error – Frequently Asked Questions
This error typically occurs when your WordPress site’s SSL/TLS certificate is damaged. Other causes include an expired or invalid SSL certificate, misconfigured HTTPS settings, browser cache or incorrect system time, a non-trusted SSL certificate authority, mixed content issues (HTTP resources on an HTTPS page), and antivirus or firewall interference.
Use SSL Checker to check your SSL certificate’s expiration date. If it has expired, renew it through your hosting provider or SSL issuer.
To handle mixed content issues, set your WordPress URL to HTTPS in Settings -> General and use a plugin like Really Simple SSL.
Clear the browser cache and restart, check the system time and date (incorrect time can cause SSL errors), turn off browser extensions that might interfere, and temporarily turn off your antivirus (some have HTTPS scanning that may block SSL).
Use a plugin like Better Search Replace to update database URLs from HTTP to HTTPS, manually update image and script URLs in functions.php or style.css files, and use an online checker tool to find mixed content.