In this guide, I’ll walk you through four practical methods for adding text over an image in Elementor, allowing you to choose the approach that best suits your site and Elementor version.
Whether you’re using the free Elementor, Elementor Pro, or want fully interactive labels, you’ll learn step-by-step techniques to create stylish text overlays.
This post focuses on the key task of text over an image element in Elementor — and shows you simple, reliable ways to achieve it.
Outline
- Method 1 — Image Widget with Caption + CSS (works with free + Pro)
- Method 2 — Text/Title Widget with Background Image
- Method 3 — Gallery (or Posts/Portfolio) Widget Caption
- Method 4 — Hotspot Widget (Elementor Pro) for multiple text points
- Design and responsive tips
- FAQ
Method 1 — Image Widget + Caption and CSS (Accessible to Everyone)
This method uses the built-in Image Widget and is great if you want a single piece of text positioned over an image. It’s flexible and works with both free and Pro users (with minor differences).
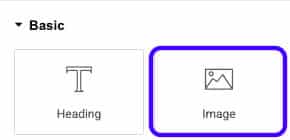
- Drag the Image Widget to the canvas and insert your image.

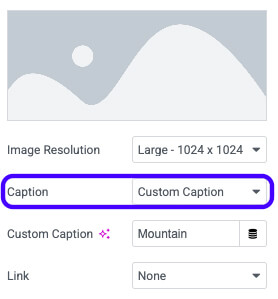
- Under Content > Caption, switch from None to Custom and type your text (for example, “Mountain”).

- Go to the Style tab and open Caption to set font size, color, letter spacing, and background, if needed.
- To position the Caption over the image, you’ll use CSS:
- If you have Elementor Pro, open Advanced > Custom CSS and paste the code targeting the .elementor-image-caption selector (or whatever selector you use).
- If you use the free version, in Advanced > CSS Classes, add a custom class, such as text-over-image. Publish, then open Appearance > Customize > Additional CSS in WordPress and paste the same CSS there.
- Adjust the caption background opacity, image width (set the image to full width if needed), and then publish.

selector figcaption {
position: absolute;
margin: 0;
width: 100%;
top: 50%;
transform: translateY(-50%);
}
This approach is ideal when you want precise styling control for single images. It’s also the method I recommend if you’d prefer to host CSS in the Customizer rather than inside Elementor.
Method 2 — Text or Title Widget with a Background Image
If you want to display larger blocks of text over an image (such as hero sections or banners), the Text Editor or Title widget with a background image is a fast and responsive option.
- Drag a Text Editor or Heading widget onto the canvas and enter your text (e.g., “I love snow”).
- Style the text in the Style tab — center it, change color, increase font size, and make it bold.
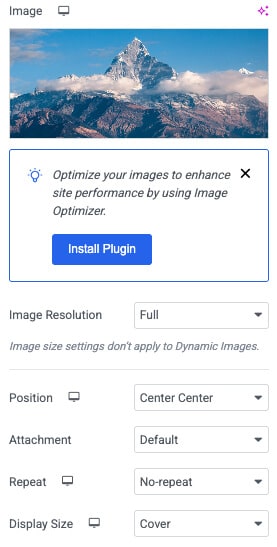
- In Advanced > Background (or the section/column background), choose your image and set Position: Center Center, Repeat: No-repeat, and Size: Cover.

- Add padding in Layout (top and bottom) to reveal more of the image. Increase the padding to reveal more of the background image (e.g., 100–200px, depending on the desired look).
- Switch to mobile view and adjust the font size and padding so that the text and image appear well on smaller screens.

This method is straightforward and requires no CSS. It’s perfect for hero images, banners, and any place you need large text centered over a background.
Method 3 — Gallery, Posts, or Portfolio Widgets (Elementor Pro Suggested)
Want text overlay for multiple images in a grid? Use the Gallery widget (or Posts/Portfolio widgets if you have content-driven layouts). This method is excellent for product galleries, portfolios, and image-heavy sections.
- Use the gallery widget to create your Gallery. Add a Gallery to each image.
- Change Columns to 1 if you want a single-image full-width display, and set Image Size to Full to avoid pixelation.
- Under Overlay, you can turn off the dCaptionhover background. Then set Caption to show (switch from Caption to Captiono).
- By defaul,t the caption mayappearr on hover. To make the Caption always visible, go to Style > Caption and set Hover Animation to None.
This produces clean image tiles with captions over them. Use it for galleries where each image needs a visible label or short description.
Method 4 — Hotspot Widget (Elementor Pro) for Multiple Interactive Labels
The Hotspot widget is the most interactive option. It allows you to place multiple markers on a single image and display text for each point — ideal for product diagrams, maps, and educational images.
- Drop the Hotspot widget and select your image.
- By default, you’ll get one hotspot. Edit its Label and Description (e.g., Label: Nose, Description: This is the dog’s nose).
- Use the Position settings to place the hotspot precisely where you want it on the image.
- Add as many hotspots as you need — tail, ear, etc. Each hotspot can have its own text and position.
- Choose the trigger: Click or Hover. Set it to ‘Hover’ if you want the text to appear when the mouse hovers over it.
Hotspots are perfect when you need multiple text points on a single image with interactive behavior.
Design Tips and Responsive Considerations
- Always check mobile view: fonts and padding often need adjustment for smaller screens.
- Use background opacity or semi-transparent caption backgrounds to improve text readability over busy images.
- For accessibility, maintain high contrast between text and background, and avoid placing important text over extremely detailed areas of an image.
- If you’re not comfortable with CSS, stick with the Text widget background or Gallery caption methods — they require no custom code.
Add Text Over Image in Elementor – Frequently Asked Questions
Yes. The Image widget caption method works with the free version. If you don’t have Pro’s Custom CSS, add a custom class to the widget and paste the CSS in WordPress > Customize > Additional CSS.
For the Gallery widget, go to Style > Caption and set Hover Animation to None. For Image widget captions, ensure you position and display the Caption by default.
Use the Hotspot widget (Elementor Pro). It allows you to place multiple markers with labels and select either click or hover triggers.
Add a caption, adjust text color and weight, or place the text over a less-detailed portion of the image. Increasing contrast is key.
If you need the exact CSS snippet, create a custom class on the image widget (e.g., text-over-image) and paste the positioning/appearance rules into Additional CSS in the WordPress Customizer or into Advanced > Custom CSS if you have Elementor Pro.
Conclusion
There are multiple ways to add text over an image in Elementor, depending on your needs and the Elementor vCaption feature.
Use the Image widget with Caption and CSS for precise single-image overlays, the Text/Heading widget with background banners and hero sections, the Gallery for creating gallery grids, and the Hotspot widget for interactive multi-point annotations.
Please select the method that best fits your workflow and design goals, and remember to test it across various devices.
If you have questions or need help applying a method to a specific layout, please leave a comment or reach out — I’ll be happy to help you implement the best approach for your site.
