
Securing your WordPress website with an SSL certificate is essential in today’s digital world.
Not only does it protect your site visitors’ data, but it also increases your site’s credibility and search engine ranking.
In this comprehensive guide, we will walk you through one of the easiest step-by-step methods for installing a free SSL certificate on WordPress websites.
Why You Need an SSL Certificate on Your WordPress Site
The “Not Secure” warning next to your website URL in the browser is a clear indication that your site does not have an SSL certificate.
SSL (Secure Sockets Layer) encrypts the data transferred between your visitors and your website, protecting sensitive information such as login credentials, personal details, and payment data.
Google and other search engines also prioritize secure sites in their search results, so having an SSL certificate will not only enhance security but also improve your search engine optimization (SEO).
Additionally, modern browsers alert users when they visit non-secure sites, which can be unsafe for visitors or customers.
Overview: How to Install SSL Certificate WordPress for Free
This guide covers using the WP Encryption plugin, a user-friendly tool that lets you generate and install free SSL certificates for your WordPress site. The process involves:
- Installing and activating the WP Encryption plugin
- Generating a free SSL certificate
- Verifying domain ownership via HTTP challenge
- Installing the SSL certificate through your hosting cPanel
- Enabling HTTPS on your WordPress website
Let’s start with the first step, installing the WP Encryption plugin.
Step 1: Access Your WordPress Admin Dashboard
First, you can log in to your WordPress admin panel using your username and password.
The default WordPress login URL ends with /wp-admin. This is the control center for managing your WordPress site, including plugins and security settings.
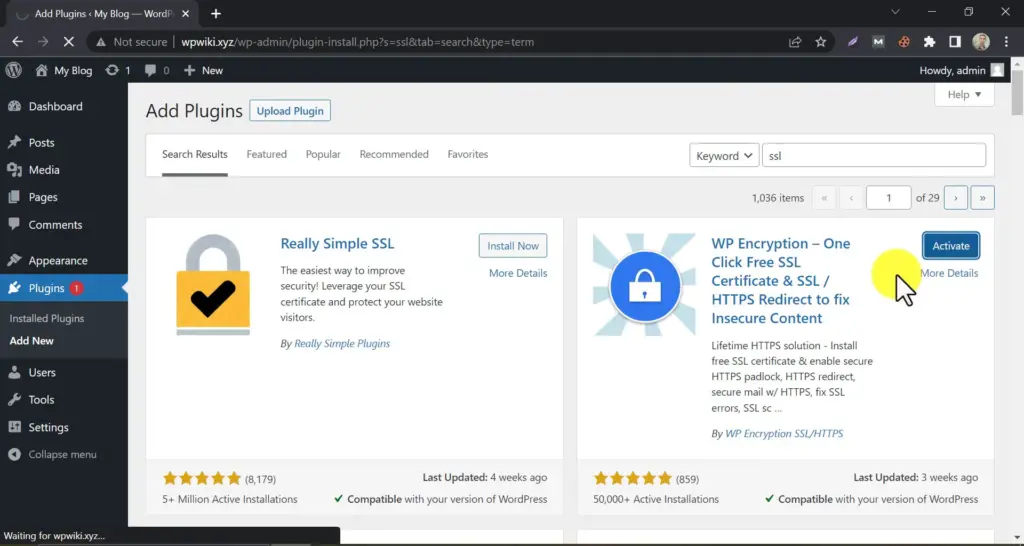
Once logged in, navigate to the Plugins section on the left sidebar and click Add New.
In the plugin search bar, type “SSL” and look for the WP Encryption plugin. This plugin simplifies the process of obtaining a free SSL certificate for your WordPress website.
Click ‘Install Now’ and then ‘Activate’ once the installation is complete.
Once activated, you can safely skip the opt-in step and go ahead with this article.
Step 2: Choose the Free SSL Certificate Plan
The WP Encryption plugin offers both free and pro options. For this tutorial, we will use the free plan, which is more than sufficient for most small to medium-sized websites.
Click on the free plan to proceed to the SSL certificate generation page.
Step 3: Generate Your Free SSL Certificate
On the certificate generation page, enter your email address. This is required for certificate validation and renewal notifications.
Please ensure that you check the ‘cover both the www and non-www versions of your domain’ box.
This ensures that visitors accessing your site with or without “www” will both experience a secure connection.
Then, accept the mandatory terms and conditions.
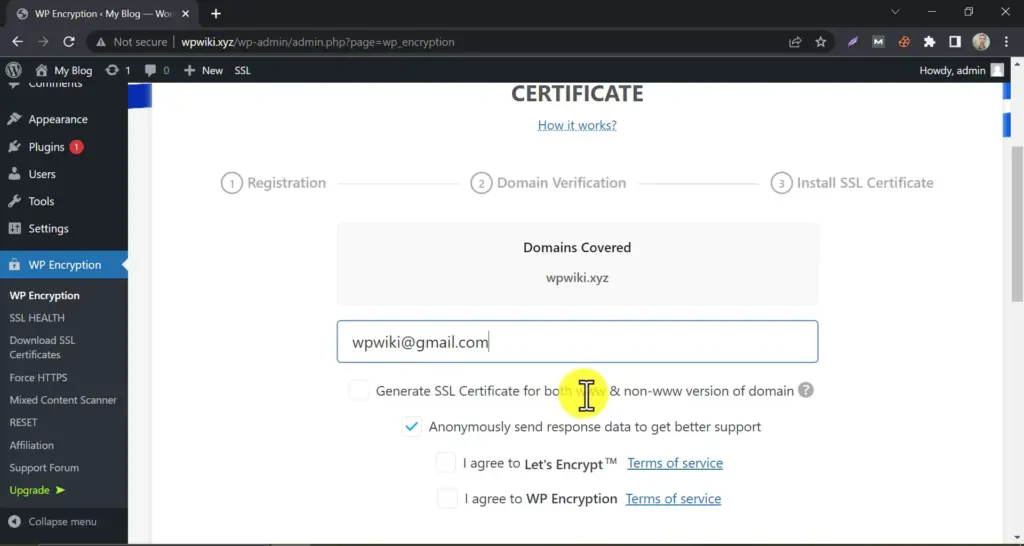
Finally, click the “Generate SSL Certificate” button to start generating the certificate.
Step 4: Verify Your Domain Ownership
You must verify that you own the domain before issuing the SSL certificate, and you can do it in two different ways:
- HTTP Challenge: Uploading verification files to your website server.
- DNS Challenge: Adding specific DNS records to your domain provider.
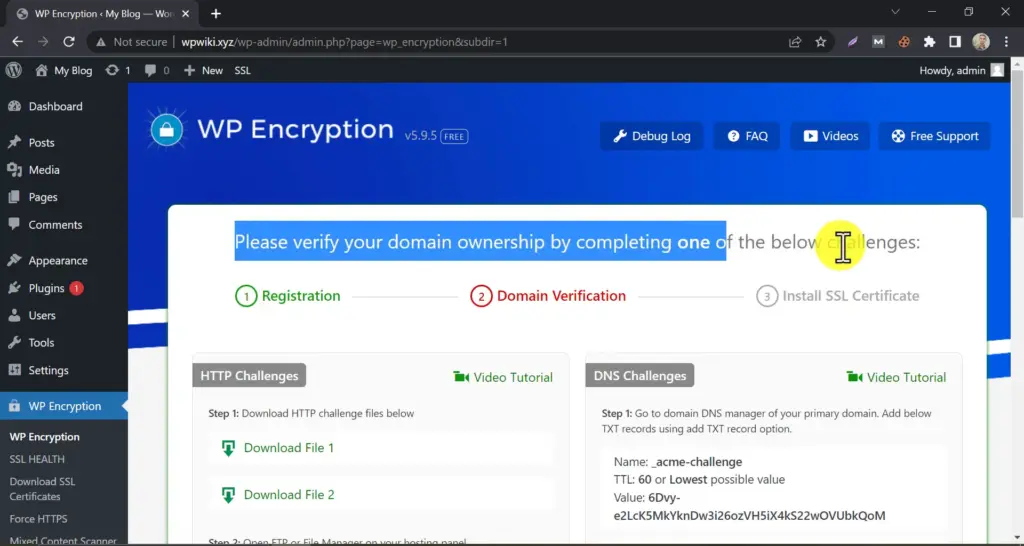
For simplicity and ease, we recommend the HTTP challenge method.
Using the HTTP Challenge Method
To complete the HTTP challenge, you need access to your website’s hosting cPanel. Here’s how to proceed:
- Log in to your hosting cPanel.
- Navigate to the File Manager under the Files section.
- Open the
public_htmldirectory if your domain is the primary domain on your hosting. - Enable viewing hidden files by clicking Settings and selecting Show Hidden Files.
- Create a new folder as instructed by WP Encryption. Copy the folder name and paste it into the plugin interface.
- Inside this folder, create another folder following the same process.
- Download the two verification files provided by WP Encryption.
- Upload these files into the newly created folder using the File Manager’s upload feature.
- After uploading, reload the File Manager to confirm the files are visible.
- Verify the uploads by clicking the file links—they should open in your browser if the uploads are correct.
- Return to the plugin and click Verify HTTP Challenge.
Once verification is successful, you will see a Congrats message indicating that the SSL certificate was generated successfully.

Step 5: Installing the SSL Certificate via cPanel
After generating the SSL certificate, you’ll need to install it on your hosting server. To do that, follow the following steps:
- Log back into your hosting cPanel.
- Click on the SSL/TLS tab.
- Scroll down and click “Manage SSL sites.”
- Select your domain from the list.
- Copy the certificate keys from WP Encryption and paste them into the corresponding boxes (Certificate, Private Key, and CA Bundle) in the cPanel interface.
- Click Install Certificate.

Once completed, you will get confirmation that the SSL certificate is now active on your domain.
Step 6: Enable HTTPS on Your WordPress Website
Return to your WordPress site and enable HTTPS to start using the SSL certificate. You can do this through the WP Encryption plugin or by updating your WordPress and site URLs to use https://.
Sometimes, the system might not immediately detect the new SSL certificate.
If you encounter an error message stating, “Could not detect any valid SSL certificate,” please wait approximately three minutes for the system to update the SSL status.
After you wait, please refresh your website. You may need to log in again. Once logged in, notice the security lock icon in the browser’s address bar, indicating your site is now secure.
Monitoring Your SSL Certificate Validity
WP Encryption conveniently displays an SSL certificate expiration countdown in your WordPress dashboard. The free SSL certificates issued are valid for 90 days. Before expiration, you can repeat the same process to renew your certificate at no additional cost.
If you prefer a more permanent SSL solution that doesn’t require frequent renewal, consider opting for a lifetime SSL certificate or a paid SSL service.
Additional Tips for a Smooth SSL Installation
- Backup Your Website: Always back up your website before making significant changes, such as installing an SSL certificate.
- Clear Browser Cache: After enabling HTTPS, clear your browser cache or test in incognito mode to see the updated certificate.
- Update Internal Links: Ensure all internal links and media URLs use HTTPS to avoid mixed content warnings. You can set up 301 redirects from HTTP to HTTPS to ensure all traffic is securely routed.
- Check SEO Settings: Update your sitemap and notify search engines of the HTTPS version of your site.
Frequently Asked Questions (FAQ)
An SSL certificate encrypts data between your website and visitors, protecting sensitive information. WordPress sites ensure security, build user trust and improve SEO rankings.
Yes, using plugins like WP Encryption, you can generate and install a free SSL certificate, which typically lasts 90 days and can be renewed easily.
HTTP challenge requires uploading verification files to your website’s server, while DNS challenge involves adding specific DNS records at your domain registrar. HTTP is generally simpler for most users.
After installation, it may take a few minutes (usually up to 3 minutes) for the SSL certificate to become active and detectable on your site.
Mixed content warnings occur when some elements on your site load over HTTP instead of HTTPS. Update all internal links and media URLs to HTTPS and use plugins (such as 301 redirects) or manual redirects to fix these issues.
Free SSL certificates issued via WP Encryption are valid for 90 days. You should renew them before expiration by following the same installation process.
Yes, lifetime SSL certificates are available through paid options. These do not require frequent renewal and provide long-term security.
Conclusion
Installing an SSL certificate on your WordPress website is not only recommended but also necessary for several reasons. Dedicated plugins can simplify the process and keep costs to a minimum, or even make them free.
With tools like WP Encryption, you can secure your site with a free SSL certificate in just a few simple steps. This not only protects your visitors but also enhances your site’s reputation and search engine rankings.
Remember to verify your domain ownership correctly, install the certificate through your hosting cPanel, and enable HTTPS on your site. Remember to check your certificate’s expiration date to renew it on time, ensuring uninterrupted security.
I hope this guide helped you understand the importance of an SSL certificate for your website and how simple the process is to install it.
